

For the past couple of summers, I've gone over to my friend Kari's house to pick yellow plums from her backyard. This tree gives and gives gorgeous, mellow yellow fruit.
Last year, the tree almost went overboard with its generosity. Kari called everyone she knew to come and pick plums. Afterward, there were still more, as in falling-to-the-ground-and-attracting-bees-and-getting-squashed-underfoot-by-the-kids more. Desperately, Kari called the gleaners. They came, they picked, they handed her a receipt for the amount of fruit collected: over 500 pounds. From one backyard tree!
We actually went to pick our plums after the gleaners were done and the tree gave us yet another 50 pounds to take home, with more still visibly weighing down its generous branches.
I learned something from bringing home 50 pounds of one type of fruit. It's a bit like winning the lottery, I imagine. After you get home, you have to take a moment to stand back and wonder at what to do with all the wealth that you've suddenly acquired. It almost feels like too much -- although the greedy pig inside you would never admit it.
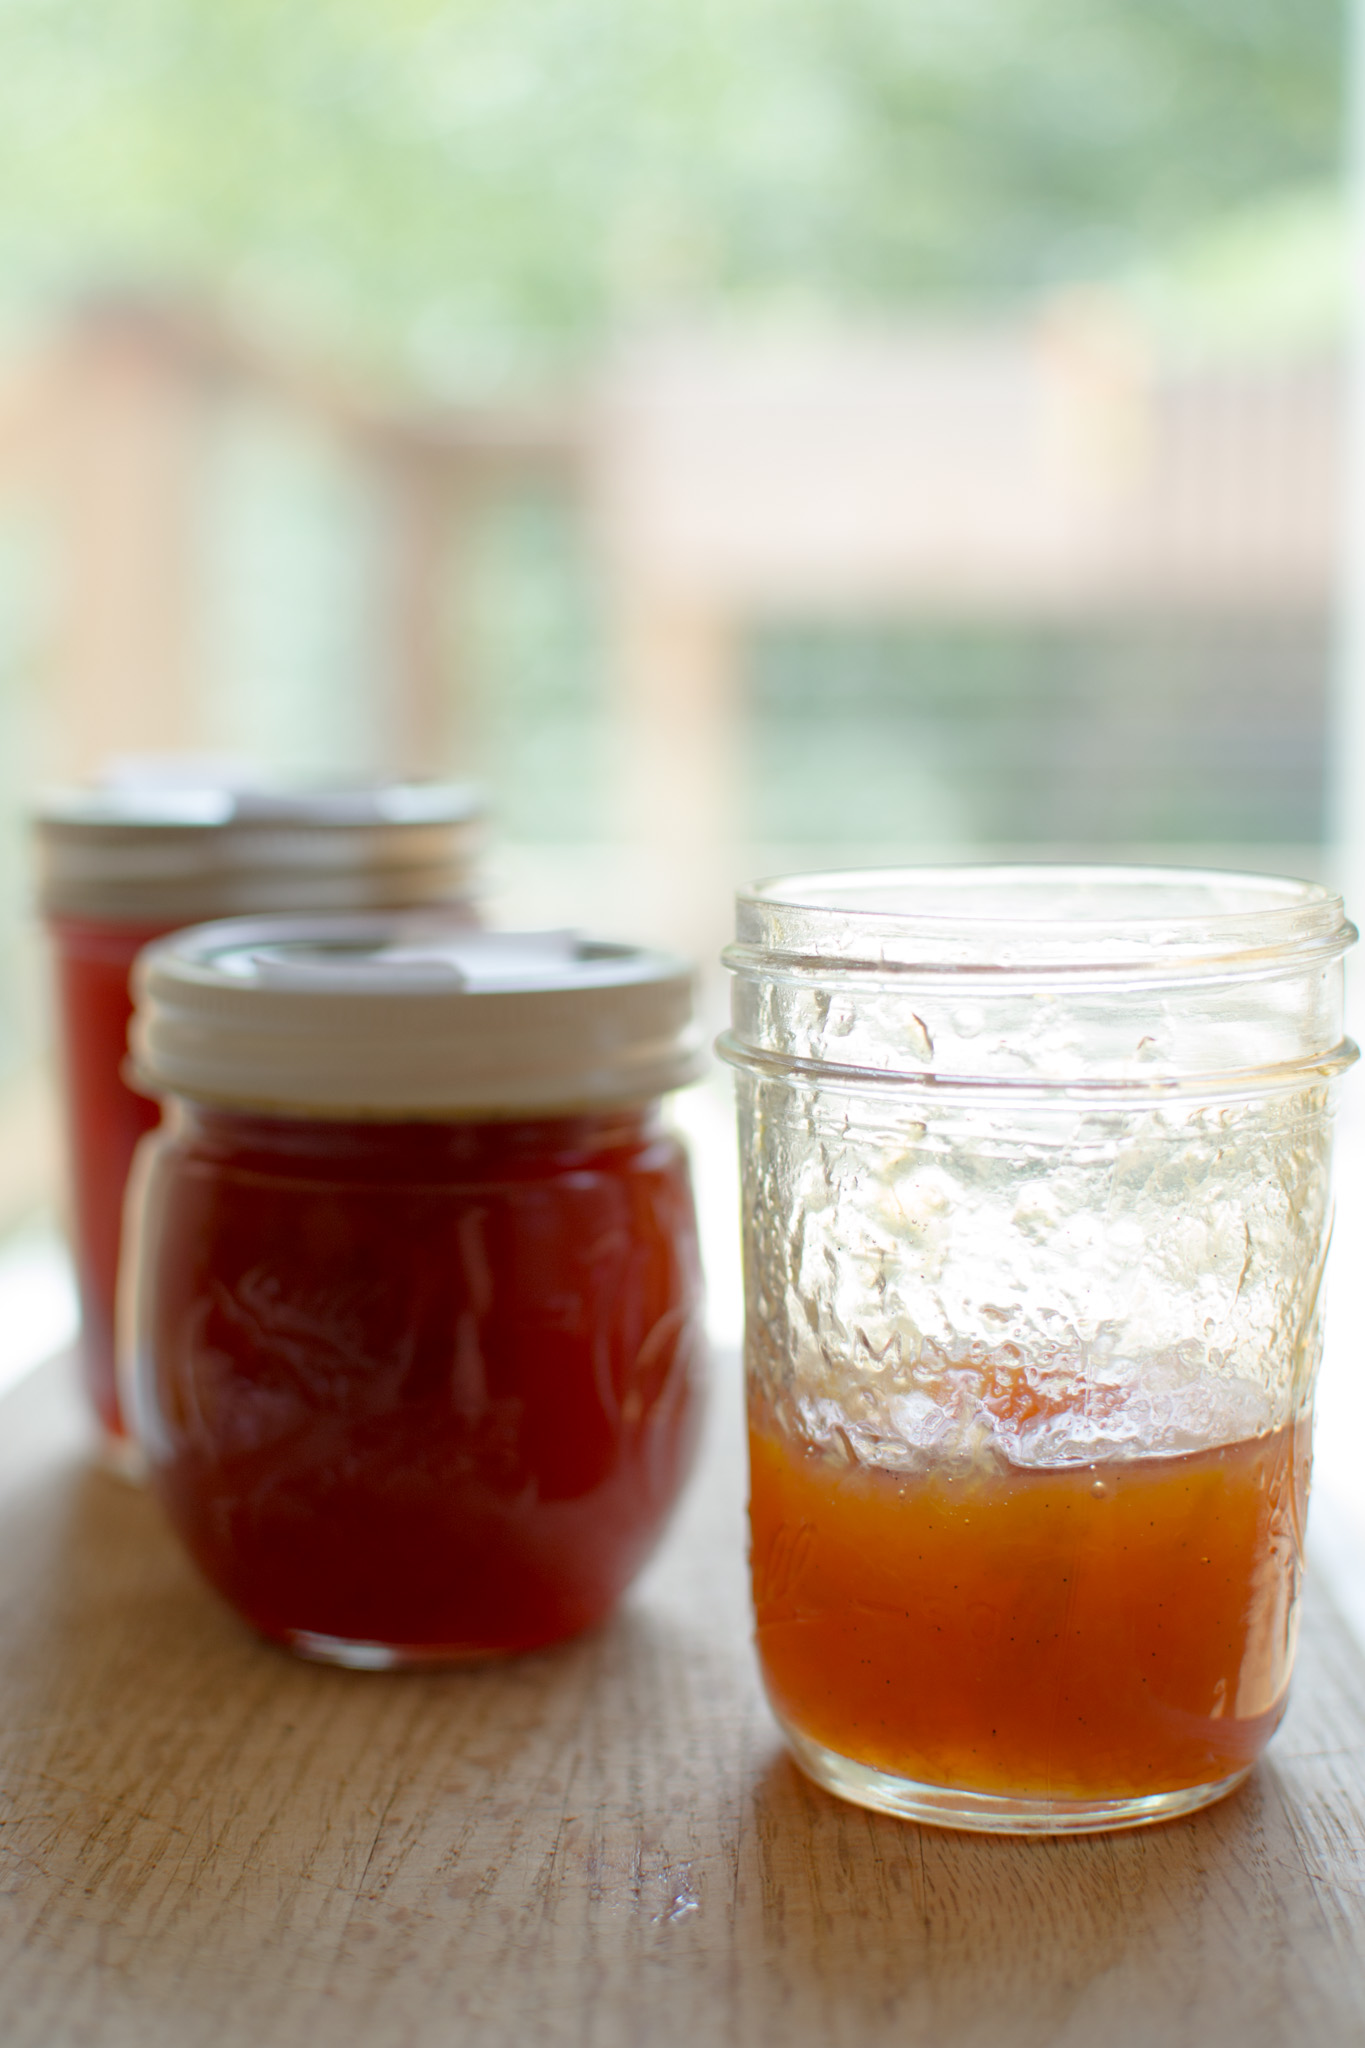
Mostly, I made jam with the plums. All day jamming sessions that went late into the night for a couple of days in a row. Then I used the jam to make all sorts of things like cakes and cookies. But mostly, I happily spread the sweet-tart stuff onto buttered toast.

The main thing I took away from my plum jam-making is that it is a process. It's hard work, and you get really sweaty from all the boiling and boiling away that is happening. Your arm starts to ache from stirring to prevent scorching and skimming the scum off the top. If making more than one batch, you might also get snapped at here and there by a husband who is providing childcare to a toddler and wondering when you will actually be finished with your seemingly never-ending project.
It's not glamorous work at all, though you'd never know it from the final product, which sits innocently -- and at times, glamorously -- gleaming in small glass jars on your pantry shelf, like a girl who knows she is beautiful but who doesn't want you to think she realizes it.
Despite the involved process, the maker of things in me just loves putting up jam.
But a bit more about what I've learned. Jam must be made in modest quantities. With plums, especially, it seems the smallest batch that you can make without feeling let down by the fact that you only have six puny jars at the end of it, is best.
Plums, especially the yellow ones from Kari's tree, are full of water. They have to be macerated first in sugar, softening their skins and leaving you with fruit basking in layers of golden syrup. Then, they have to be cooked down longer than other less moisture-laden fruit.
They mustn't, however, be overcooked, which is more likely to happen if you make a larger batch of jam. If the fruit is cooked too long, it loses the beguiling, fragrant quality that makes it so attractive in the first place, leaving only tartness and a one-dimensionality behind.
This year, I only took home 18 pounds of plums from Kari's tree (even as she attempted to hand me more). I made it all into jam.
When you live in a place that rains nine months out of the year, a fragrant plum jam is most welcome on the darkest of winter's days. It is the best reminder of sweeter, warmer times when it was possible to spend a sunny afternoon with friends, reaching up into a giving tree to pluck its ripe, bloom-covered fruit.
Yellow Plum Jam with Vanilla
This is a jam for anyone who loves tart flavors. The addition of vanilla gives the jam additional complexity and a lovely fragrance. We make a lot of vanilla ice cream during the summer months and always have spent vanilla beans sitting in a jar of sugar. That's what I used here. You can also probably use some vanilla extract added at the end, but that might not give as nice a flavor as the spent vanilla pod would.
You'll also notice that this recipe does not contain any liquid or powdered pectin. I prefer not to use it, as I feel it gives the jam a murky taste. I generally prefer the clean, bright flavor of fruit with a softer set to a firmer-set jam with cloudier flavor.
Slightly adapted from The Blue Chair Jam Cookbook.
Makes 6 to 7 8-ounce jars.
Ingredients
2 pounds, 3 ounces (35 total ounces) pitted and halved yellow plums (to be mashed/pureed)
2 pounds, 5 ounces (37 total ounces) pitted yellow plums, halved
1 1/4 pounds plus 3/4 pound white cane sugar
2 to 6 ounces freshly squeezed lemon juice, strained
1 spent vanilla pod leftover from other cooking activities, or 1 teaspoon vanilla extract
Instructions
Day 1
In a large non-reactive bowl, layer the 2 pounds, 3 ounces of fruit with 1 1/4 pounds of sugar and 1 ounce of lemon juice. It is important to make sure each of piece of fruit is covered with the sugar and lemon juice. In another separate non-reactive bowl, combine the 2 pounds, 5 ounces of plums in the same manner with the remaining 3/4 pound of sugar and 1 ounce of lemon juice. For each container, press down a piece of plastic wrap against the fruit to prevent browning. Cover both bowls tightly and allow to macerate in the refrigerator for 24 hours. If you find that you can't get to it by then and need a little bit more time, that is fine as well.
Day 2
Place a saucer with a few metal teaspoons on it in the freezer. You will use this to test your jam later for doneness.
Remove plums from the refrigerator. Scrape the 2 pounds, 3 ounces of macerated plums into a large, non-reactive dutch-oven or other similar type of wide cooking vessel with high sides. Place over medium-high heat, stirring often until they soften, about 5 minutes. Remove from the heat and coarsely mash (I used a potato masher, but you can also use a food mill), breaking up larger chunks.
Add the uncooked, macerated plums. Taste the mixture. Very gradually add lemon juice as needed. Taste as you go. The flavor of the lemon juice should be present but not overpowering. The ideal is to be able to just detect the tartness of the lemon.
Bring the jam mixture to a boil over high heat, stirring frequently with a large, heatproof spatula. Boil, stirring frequently until the jam thickens, 30 to 45 minutes. As the jam cooks, use a large stainless steel spoon to skim off foam from the surface. Discard. Scrape the bottom of the pan often. Very importantly, decrease the heat gradually as more and more moisture cooks out of the jam. Stir the jam slowly and steadily the last 10 minutes of cooking to prevent scorching.
When the jam is thickened, test it for doneness. Remove a spoon from the freezer and scoop a half-spoonful of jam with it then put it back in the freezer for 3 minutes. Remove and feel the underside of the spoon. It should be neither warm nor cold. If still warm, put it back in the freezer for another moment. When ready, hold the spoon vertically to see how quickly the jam runs. It is done when it is thick and gloppy. If it runs off the spoon, cook your jam for another five minutes, stirring, then test again.
Turn off the heat and don't stir the jam. If any foam remains, skim it off the surface. Add the vanilla pod by pressing it slightly down into the jam. Allow the jam to sit for 10 minutes, then pour the jam into prepared, sterilized containers (here's a nice how to), leaving behind the vanilla pod.
Process the jars in boiling water for 10 minutes. Remove from water bath and place on a rack, with jars at least an inch apart. Allow to cool overnight without disturbing. This jam will last for one year.